The Ultimate Guide to Building the Most Popular Garden Fence (Plus a Few Pro Secrets!)
Alright folks, Mark Marshall here, and today we’re diving deep into the wonderful world of fences. Not just any fence, mind you, but THE most popular fence you can have gracing your garden right now. We’re talking curb appeal, neighbor envy, the whole shebang! So grab your gloves, and let’s get cracking.
Phase 1: The Great Fence Rip-Out!
First things first: demolition. Out with the old, in with the new, right? This is where the heavy lifting (and a bit of cathartic destruction) begins. Get that old fence outta there! This is all the start to a new trendy fence, check out trending products here!
Laying the Groundwork: Posts and Protection
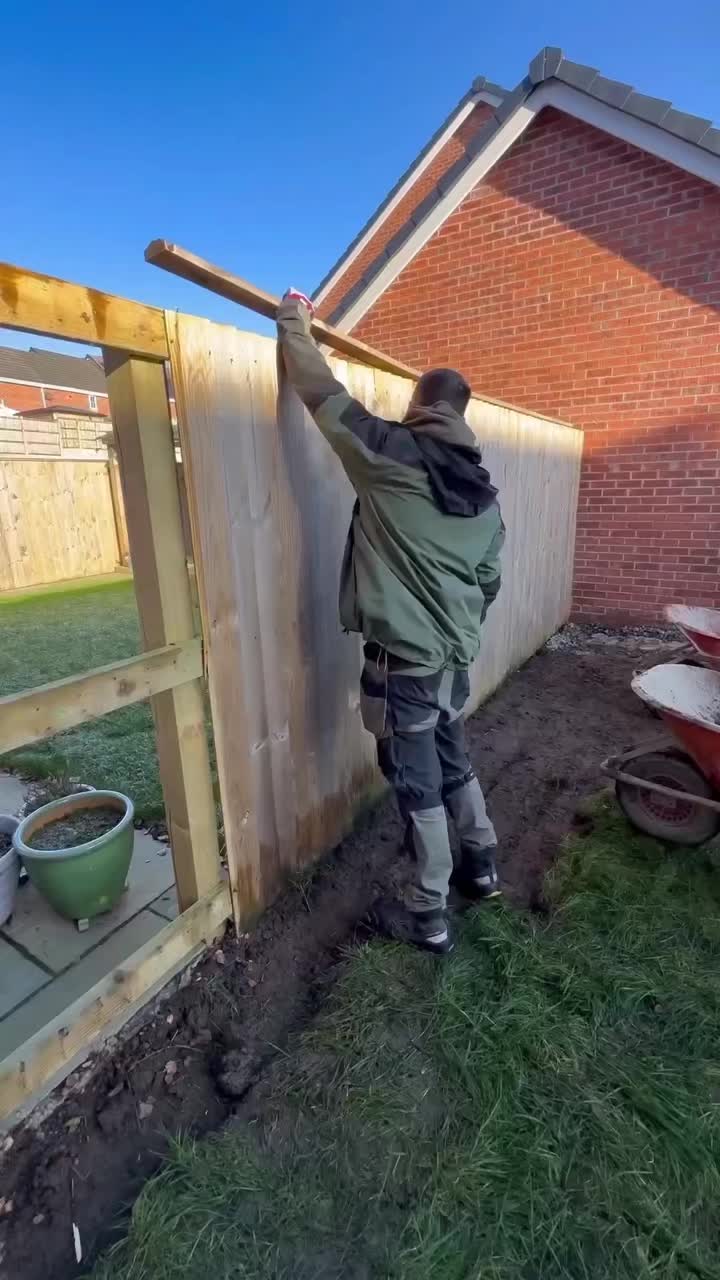
Now, onto the backbone of our masterpiece: the posts. We usually space ’em about 6 feet apart, but hey, sometimes you gotta improvise! On this particular project, one post decided to throw a tantrum and break, so we had to replace it. That’s just how it goes sometimes, isn’t it?
- Bitumen is Your Friend: This is a crucial step. Always paint the bottoms of your posts with bitumen. Think of it as a raincoat for your wood, protecting it from the dreaded moisture that lurks in the soil. It seriously prolongs the life of your fence.
- Screws for Extra Security: We bang in a few screws for good measure. It’s like adding a belt to your suspenders – extra security never hurts!
Adding a Touch of Privacy (and Style): The Screen
Next up, we add a screen. This is where the visual magic starts to happen. We use a simple cloth membrane. Think of it as a privacy curtain, giving you that secluded oasis feel in your garden. This adds a cool effect!
The Bottom Button: The Foundation of Fence Success
This, my friends, is the most important part. The bottom button. This is your baseline, your level zero, the foundation upon which your entire fence will stand (literally!).
- Level, Level, Level! I can’t stress this enough. Make absolutely sure that bottom button is perfectly level. If it’s wonky, your whole fence will be wonky. And nobody wants a wonky fence, do they?
Building Upwards: Joints and Spacers
Now we start building upwards, plank by plank. We always make sure that our joints are spread out. We just like the look of it, staggered and interesting.
- 12mm Spacer: Our Go-To Gap Size: For the gaps between the planks, we use a 12mm spacer. That’s just our preference, the way we like it. Find what works for you! A pro tip use event supplies to measure everything correctly for the perfect fence!
The Grand Finale: Top Caps and Side Caps
Almost there! Now we add the top cap. This is the finishing touch, the cherry on top, the… well, you get the picture. It just makes the whole thing look polished and professional.
- The “Old, Better Button” Trick: We have an old, better button (as you can see!) and we pin it in with stainless steel nails. Why stainless steel? Because you don’t want rust streaks ruining your beautiful fence. Trust me on this one.
- Side Caps and CT1: Sealing the Deal: We run a bead of CT1 along the side caps. This stops moisture from sneaking in between the fence and, in this case, the garage. Moisture is the enemy, folks!
A Little Something Extra: Orco Lighting!
On this job, we went the extra mile and installed some Orco lighting. It adds a real touch of class, doesn’t it? Let me know what you think of the end result!
The Million-Dollar Question: How Much Does It Cost?
Alright, alright, I know what you’re all thinking: “Mark, this fence looks amazing, but how much is it gonna set me back?”
On this particular job, the fence cost around two and a half thousand pounds. Now, that might sound like a lot, but remember, you’re paying for quality materials, expert craftsmanship, and a fence that’s gonna be the envy of the neighborhood for years to come. Plus, investing in your outdoor space adds value to your property!
Final Thoughts: Let’s Hear From You!
So, there you have it! The ultimate guide to building the most popular garden fence. What do you think? Would you give this a go? Let me know your thoughts in the comments below! Maybe you want to express yourself with some political merchandise in your garden!
I’ll see you on the next one!
I’m gonna show you how we build the most popular fencethat you can have in your garden right now.Stage 1 is the rip out.Once that’s done,we work on our post.So we go for 6 foot apart.But on this project,one was broke,so we had to replace one.We always paint the bottoms of our post with bitumen.We bang some screws inbecause this prolongs the life of your fence.Then what we do iswe add a screen.And so we just use a cloth membrane.This is just for visual effects.Once that’s done,we then add the bottom button.That’s the most important.Always make sure that is super levelbecause all the rest of your fencegoes off that one button.We always make sure that our joints are spread.We just like the look of it.Then we work our way all the way to the top.Now we use a 12 mill spacer for our gaps.That is what our preference is,how we like it.Then what we do is we add a top cap in again.This is just for the.The end result.So what we do iswe have an old,better button in.Like you can see here.We pin it in with stainless steel nails.That’s important.You don’t want it to leak rust.Then what we do iswe add our side caps as well.And with our side caps,We always run a bead of CT one.This is to stop moisturefrom sitting against the garage.In this particular caseand the fence.Now, on this job,we got to do something extra special.We got to install some Orco lighting.Let us know what you think.The end result.But you’ll all wanna know how much this would cost.So on this particular job,it cost around two and a half thousand poundfor this fence.Let us know your thoughts on that.I’ll see you on the next one.video