Sashiko Secrets: The Knotless Start & Stop for Seamless Embroidery
Alright, let’s talk sashiko! It’s Lauren here, and if you’ve been following me, you know I’m all about making mending beautiful and accessible. One of the questions I get asked *all the time* is about knots in sashiko embroidery. Nobody wants a lumpy, bumpy mess, right? So, I’m going to let you in on a little secret – how to start and end your sashiko without a single knot!
Think of it like this: it’s the embroidery version of backstitching on a sewing machine. Same principle, just way more charming because, well, it’s *handmade*. And who doesn’t love that handmade touch?
Ditch the Knots: A Seamless Sashiko Start
Forget everything you thought you knew about needing knots. This technique is a game-changer. It gives you a clean finish that will make your projects look professional and polished.
Here’s the breakdown:
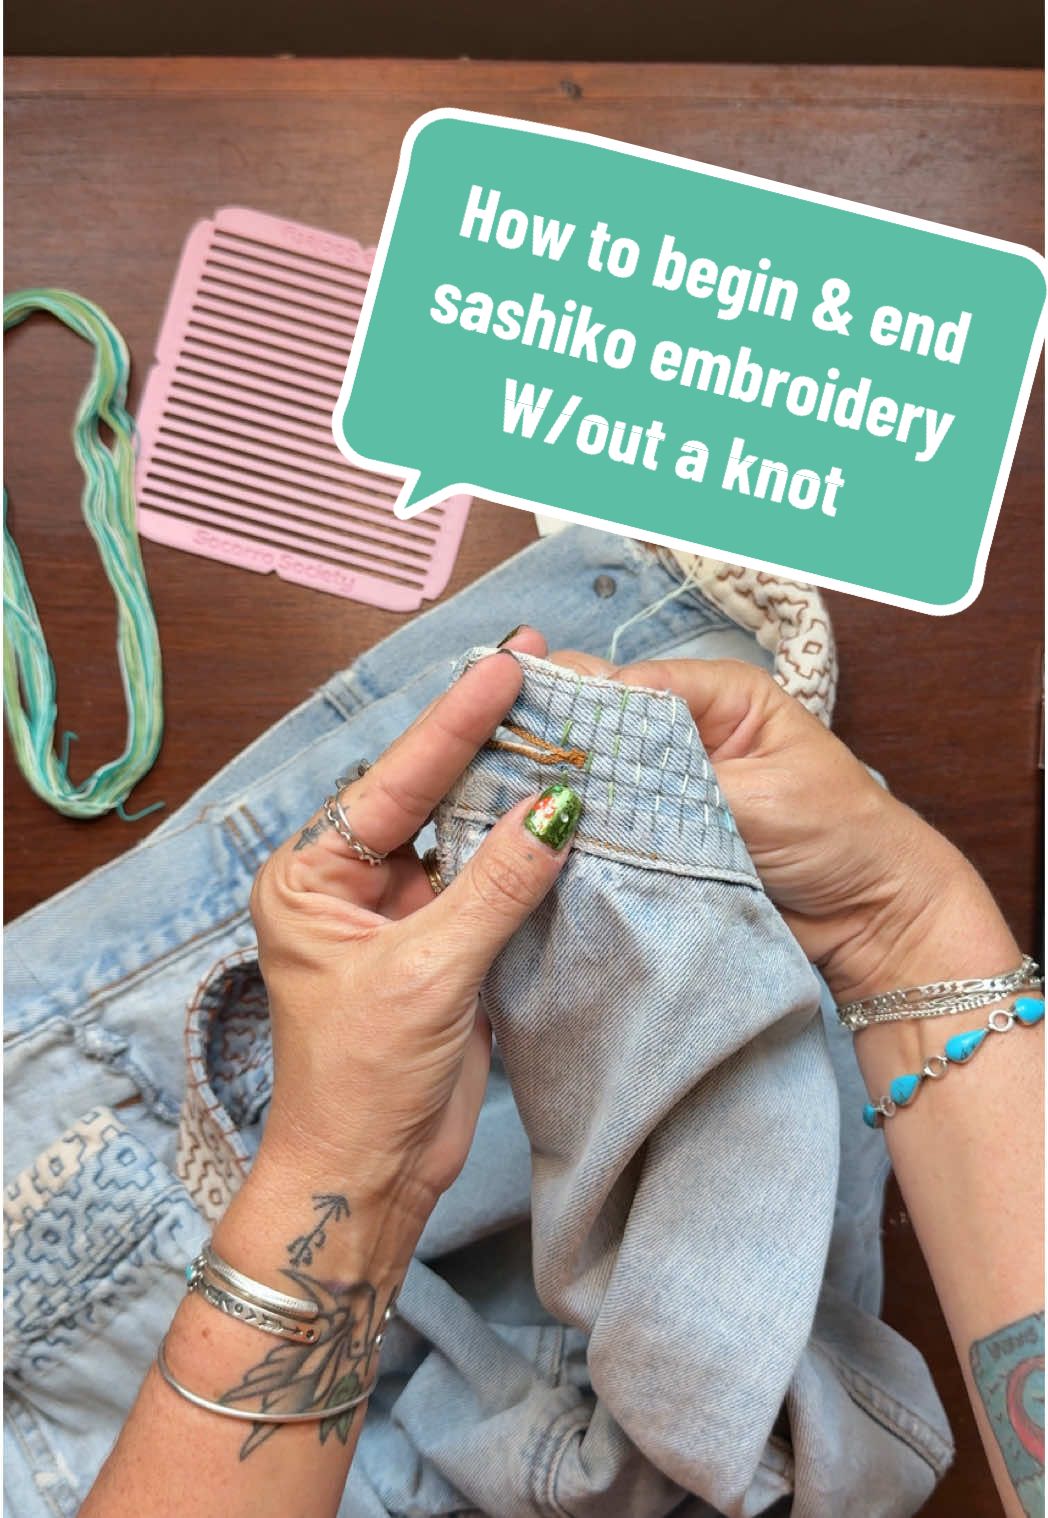
- Thread Your Needle: Just like normal, thread your needle with your sashiko thread. I usually use a thread that contrasts nicely with the fabric I’m mending. Makes the whole visible mending thing, you know, *visible*.
- The Forward Stitch: Begin your stitching by making a few small, forward stitches. Think of it as laying the foundation. These first few stitches are crucial for anchoring your thread.
- Reverse Course: Now, the magic happens! Carefully stitch *backwards* over the stitches you just made. This “locks” the thread in place, preventing it from pulling out. It’s like giving those stitches a little hug and saying, “You’re not going anywhere!”
- Continue Your Sashiko: Once you’ve backstitched over those initial stitches, you’re good to go! Continue with your sashiko pattern as usual.
The Grand Finale: Ending Your Stitching Without a Knot
Okay, you’ve created your gorgeous sashiko design. Now, how do you finish it off without resorting to a clunky knot? Same technique, just in reverse!
- The Final Row: Stitch your last row of sashiko. Get to the end of your row? Perfect!
- Back Over Your Stitches: Just like at the beginning, carefully stitch *backwards* over your last few stitches. This secures the thread and prevents unraveling.
- The Secret Escape: Now, for the final touch. With your needle still threaded, carefully insert it through the *lining* of your fabric (if you’re working on something with a lining, like a cuff as I often am). This hides the thread tail.
- Snip, Snip!: Gently snip the thread close to the fabric. Because you’ve secured it with the backstitching and hidden it in the lining, it won’t unravel. Ta-da!
Why This Method Rocks
You might be thinking, “Is this really necessary? Knots are easy!” And you’re right, knots *are* easy. But this knotless method offers so much more:
- Clean Finish: No bulky knots to detract from your beautiful work.
- Durability: The backstitching reinforces the thread, making your mending more secure.
- Professional Look: Your finished project will have that polished, handmade-with-love feel.
- Avoids Irritation: Especially important if you are mending something that will be against your skin. Those knots can be scratchy!
This technique can be used on many things from clothing to things you can find at Halloween, such as costumes.
Give It a Try!
Honestly, this knotless method is a game-changer. Once you get the hang of it, you’ll wonder why you ever bothered with knots in the first place. It may seem intimidating at first, but I promise you, it’s easier than it looks.
So, grab your needle, thread, and a piece of fabric. Give this knotless sashiko technique a whirl! And don’t forget to check out our trending products at Printiment if you are looking for things that need fixing!
More Mending Adventures Await
I’m so passionate about visible mending because it’s a way to breathe new life into things we already own. It’s about slowing down, appreciating the process, and adding a little bit of our own story to our belongings. Plus, it’s just plain fun! You can always check out Printiment’s pop culture products and add a personal touch through mending.
Let me know in the comments if you try this technique. I love seeing what you create! And as always, happy mending! I’ll catch you in the next one.
Mend with me. Hi,my name is Lauren. I teach visible mending.I wanna show you how to begin and end your sashiko embroiderywithout using a knot. Just like in machine sewing,you sew forwards, then backwards to lock those stitches in place.This is the same thing with the hand embroidery.I have finished this row of stitchinggoing from bottom to top. And to finish it off,I’m gonna go back over the stitches I just made,going top to bottom. And when I finish my last stitch,just for good measure, I send my needle through the fabric of my cuff,going through only the lining and.And snip away the thread so that there’s no tail.This is a really quick and easy wayto begin and end the threads in your work.Let me know if you try it.Thanks for watching. I hope you found this usefuland I’ll catch you on the next.video