#Level Up Your Sideline Style: DIY Family Sports Shirts That Score Big!
Okay, friends, let’s be real. I’ve always dreamt of being *that* mom. You know, the one who shows up to every game with the team spirit cranked up to eleven. But let’s also be real: store-bought sports apparel can break the bank faster than you can say “penalty kick.” So, I decided to take matters into my own hands and create custom, matching family shirts that are not only super cute but also seriously budget-friendly. Trust me, if I can do it, *anyone* can.
Gear Up for Game Day: The Supplies You’ll Need
First things first, you’ll need to gather your supplies. Don’t worry, it’s not as daunting as it sounds. Here’s what I used to create our family’s matching sports shirts:
- Shirts: I snagged mine from Hobby Lobby. They’re affordable and come in a ton of colors.
- Iron-on Vinyl: This is where the magic happens! Choose colors that coordinate with your team’s colors.
- Cricut Design Space: This is a crafter’s best friend. I found a free design that I loved and resized it to fit the shirts perfectly.
- Weeding Tools: These little gadgets are essential for removing the excess vinyl after you’ve cut your design.
- Automatic Heat Press: Okay, this is a game-changer. I recently got the HTV Ront automatic heat press, and it has seriously cut down on my crafting time. Plus, it’s the same color as my Cricut – talk about a match made in crafting heaven! If you are looking for ideas check out the designs on our trending page.
Design Time: Personalizing Your Shirts
This is where you can really let your creativity shine. Instead of putting our girls’ names on the shirts (since they’re on different teams), I decided to go with our last name and what they call us family members. It’s a fun way to personalize each shirt and show our support as a family unit.
The Heat is On: Pressing Like a Pro
Now for the fun part – using the heat press! If you’re new to heat pressing, don’t sweat it. It’s easier than you think, especially with an automatic heat press.
- Prep Your Shirt: Iron out any wrinkles to create a smooth surface.
- Placement is Key: Use a T-shirt ruler to ensure your design is perfectly centered. Trust me, it makes all the difference.
- The Magic Setting: I found that 300 degrees for 25 seconds is the sweet spot.
- Cool Down & Peel: Let the vinyl cool completely before peeling off the carrier sheet.
- Seal the Deal: Cover the vinyl with a piece of wax paper and press again for seven seconds to ensure it’s fully adhered.
Number Crunch: Making the Numbers Work
Okay, this is where things got a little tricky. Both of our girls happen to have the number “1” on their soccer jerseys. Talk about a lucky break! If they had different numbers, I would have put both numbers on the shirts with an “N” in between. Problem solved!
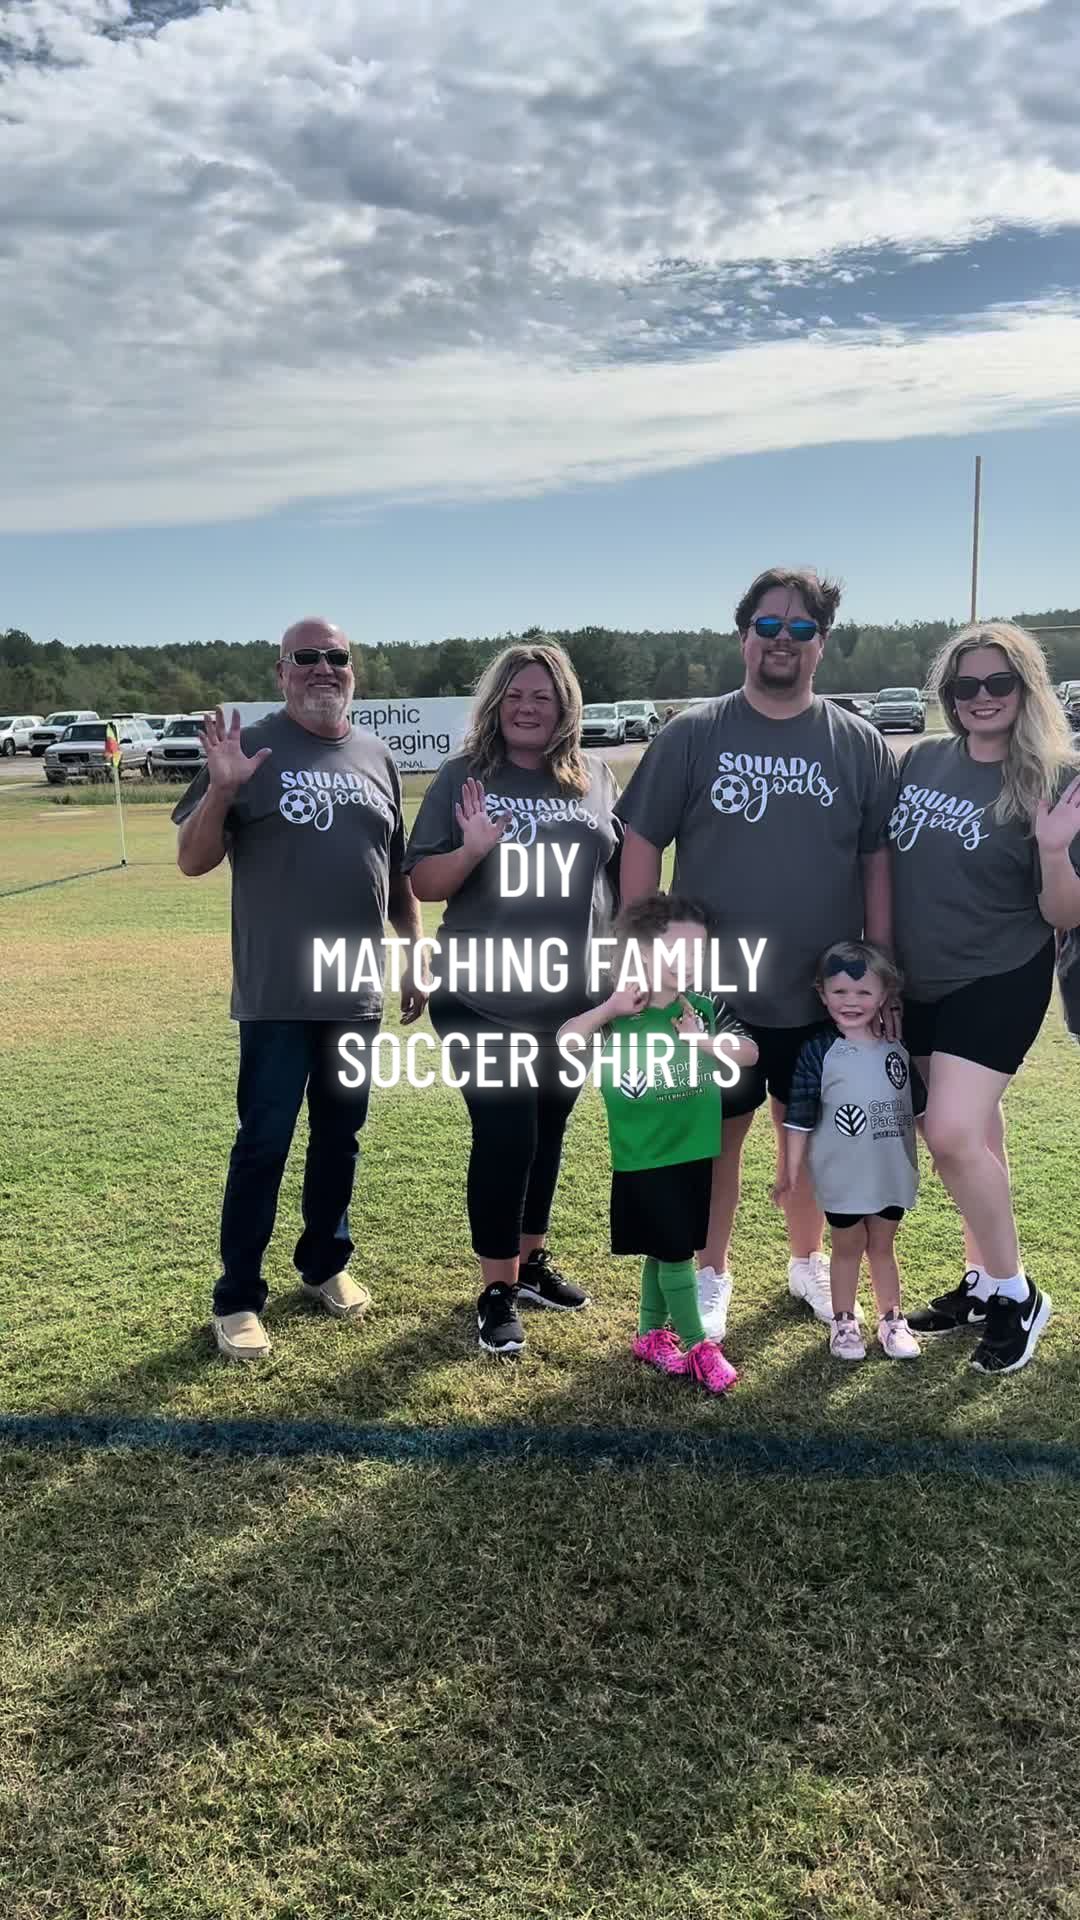
Sideline Swagger: Rocking Our Custom Shirts
And there you have it! Six custom family sports shirts in record time, thanks to my amazing new heat press. Seriously, it cut my crafting time in half! We’re ready to hit the sidelines in style.
Why Bother? The Power of Personalized Gear
You might be thinking, “Is it really worth the effort?” And to that, I say a resounding YES! Here’s why:
- Team Spirit: Matching shirts show that you’re a united family, ready to cheer on your team.
- Budget-Friendly: DIYing your shirts is way cheaper than buying pre-made ones.
- Uniqueness: Custom shirts allow you to express your creativity and stand out from the crowd.
- Memories: Creating these shirts together is a fun activity that you’ll cherish for years to come.
Level Up Your Event
Looking to create custom shirts for other events or activities? Look at our event and tour collections!
So, what are you waiting for? Grab your supplies, fire up your Cricut, and get ready to create some seriously awesome family sports shirts. Trust me, you won’t regret it. And who knows, you might even inspire other families to up their sideline style game!
I’ve always wanted to be the momwho goes all out for her kids sports team.So let me show you how I made these cutematching family shirts.I got the shirts from Hobby Lobby,and I picked this design out from Cricket Design Space,and it was free.I just resized the image to best fit the shirts.I’m making six total.Both my girls are playing on different sports teams,so instead of putting their names,I put our last nameand then what they call their family members.I love that everyone gets a personalized shirt.Now for the grand unboxing,I got this automatic heat press from HTV Ront.I love that it’s the same color as my cricket,even though they’re different brands.The item you wanna heat press just goes on this drawer,and then you slide it back in and press the button.Now I’m just weeding out all of my iron on vinyl.Somehow we got lucky,and both our girls numbers are onefor their soccer teams.So I only had to do one number for each shirt.But if they each had different numbers,I would have been both numbers on the shirtsand just put an N sign between the numbers.Now let’s use this new heat press.I press the shirt first to get out any wrinklesand used a T-shirt rulerto make sure my placement was perfect.I found the magic setting to be 300Degrees for 25 seconds,let it cool,and then peel it off.Then I use a piece of wax paper over the vinyland press it again for seven seconds.I was able to make these six shirtsand half the time with this new heat press. I love it.And here they are all done.We definitely made an impression on the sidelines.video